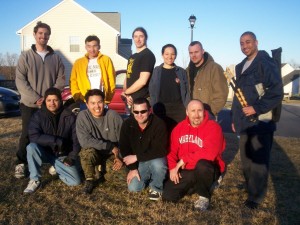
In attendance: Lem T. (instructing), Warren D. and Joe C. (assisting), Jay M., Keith H., Tom M., David D., Adam B., and Adam L.Lem reported that Warren and Joe worked with the new students on installing 3/9 right hand and 3/9 tapping for most of the class.Jay and Lem reviewed TD1, 3/9 left, 3/9 left defeats right, and the 12 count receiver grips with Tom and Keith.This class also marked the return of the “shock knife” that Keith created. No one caught on fire, so it sounds like the trial was a success.
Month: March 2006
First impression …
After the Introductory Seminar we held at the Krav Maga school, I found the following blog entry from one of the participants:
I was going to stick around for the Level 1 class but instead I went to the Knife demonstration in the other classroom.
Scary.
Someone can really hurt you with a knife if they know what they’re doing. 360s won’t do it. Inside defenses won’t do it. That became clear pretty quick.
The guys who’ve been doing it awhile were all wearing belts with knives in them. Knives, as in four or five. Different shapes and sizes. They’d pull em quick, put them back without looking and change grips without trouble.
I dropped my knife five times.
I was using a “sharky”, the plastic knives we use in Krav Maga. They have shark fin shaped holes in the blade. The Silak guys were using metal knives with dull blades.
A few basics. If you drop a knife you don’t pick it up. In a knife fight you can’t worry about a dropped knife, if you do you’ll get hurt.
When you hand a knife to someone else, you hold the handle with the blade pointed down, and hook your fingers around one side. The other person hooks their fingers around the other side and get a grip. When you feel they’ve gotten a grip you let go.
Templates. Templates are a group of targets and the strikes used to attacke them. The template we saw included the jugular on each side of the kneck, the “blue worm” just under the belt line, the line from the sternum to the belly button and the peritenium, the spot past the groin directly between the legs.
You strike the kneck with stabs. First with the palm down, pushing through the neck and into the neck toward the windpipe at the same time. The goal is to cut the jugular. You turn the wrist over so your palm is up and do the same strike.
The knife comes down and you slash across the belt line, palm up.
You raise the knife to the sternum and slash down with the meat of your hand going toward the ground.
That cut goes down and your hand goes with it, then you bring it up and stab the peritenwhatever. Its either perineum or peritenium.
I’ll write more later.
Class Notes – March 23, 2006
In attendance: Bob Shin (instructing), Maria H., Tom M., Warren D., David D. and Adam B. Prospective students: Adam L., Daniel H. and a level 2 KM student.
The more experienced students reviewed 3/9 right hand and 3/9 tapping. As always, there were small corrections to work on, but overall the quality of the drill looks really good. They then moved on to transition drill 1, extending what we worked on last weekend.
The newer students continued to install 3/9 right hand and we able to work through the taps as well.
The last third of the class was spent in free flow. The more experienced students took turns feeding and receiving from the beginners. The more different body types and “energies” that we can train with, the better.
Introductory Seminar – March 21, 2006
We had a great turn out for the free introduction to Sayoc Kali at the Krav Maga Maryland, Columbia location, with almost 20 participants total!
The topics covered included blade orientation, an introduction to vital templates and basic tapping. We also demonstrated some transition drills as well as some Phase II concepts.
Thanks to Keith H., Maria H., Tom M. and Derek L. for working with the beginners. Special thanks to Sean B. and Paul B. for coming down from Pennsylvania to help out as well.
It was a fun evening, and I hope that we were able to get people excited about Sayoc Kali!
New School Logo
Firearms Training Update
Shawn Gillin has confirmed that he will be hosting Tuhon Tom Kier for a weekend of firearms training, May 6 – 7, 2006. The location will be Shawn Gillin’s farm in Berlin, MD (just outside OC).
Email me if you are planning to attend (even if you already told me verbally that you plan to be there). I will post here when I know the cost of the weekend and what types of guns and ammunition can be accomodated.
Internal Seminar – March 19, 2006
In attendance: (back) Warren D., Shaun X., Joe C., Maria H., Keith H., Mosi J., (front) Miguel A., Bob Shin, Tom M. and Frank R.
The weather was a little chilly (as was the reception from one of my neighbors, who took down license plate numbers). The sun was out, however, and the ground wasn’t too muddy.
We warmed up with 3/9 tapping in my garage as we waited for everyone to show up. We emphasized “intent” on the attacks as well as footwork.
Once everyone had arrived, we headed down the hill into the woods. The first part of the seminar was spent on blade disarms. The key for this technique is to angle toward the hip. The technique works with either blades or fingers; in fact, several people found it easier to get the disarm to work with their fingers.
Next, we reviewed basic blade passing protocol. It turned out that many people had never learned how to toss a blade properly, so we reviewed that, gathering in a large circle and tossing blades to each other. Once everyone got the hang of this, we tried passing the blade to each other while running. (Warren received an award for being far and away the worst at this.)
Just to break things up, we spent a little bit of time throwing trainers, so that people could experience being attacked that way.
Transition drills were next. Most of the time was spent polishing TD 1 and TD 2. There are so many important details that we could probably have spent the entire seminar on just one of the drills. Particular emphasis was placed on proper targeting to draw the receiver responses. Footwork was also emphasized, particularly for moves 7 and 8 (the armbars) in TD 1.
We broke out the padded sticks for the last part of the seminar to work on basic mass attack concepts. First, we had a couple of free-for-alls. The main lessons learned were to keep moving and to watch out for attacks from behind. A little bit of time was spent one two-on-one and three-on-one. As always, movement and stacking were the key.
I had a great time. I hope everyone else did too. Now all I have to worry about is getting reprimanded by the Home Owners Association for scaring the neighborhood children …

